DIY Concrete Stairs: A Step-by-Step Guide
DIY Concrete Stairs: A Step-by-Step Guide
Concrete stairs are a durable and attractive addition to any home, providing a solid and long-lasting solution for both indoor and outdoor spaces. Whether you're looking to replace old, worn-out steps or add new stairs to your landscape, this guide will walk you through the process of creating your own concrete stairs. With the right tools, materials, and a bit of patience, you can achieve professional results on your own.

Why Choose Concrete Stairs?
Concrete stairs offer numerous benefits, including:
Durability: Concrete is incredibly strong and can withstand heavy use and harsh weather conditions.
Low Maintenance: Once installed, concrete stairs require minimal upkeep compared to other materials.
Versatility: Concrete can be molded into various shapes and designs, allowing for custom aesthetics.
Cost-Effective: DIY concrete stairs can be more affordable than hiring a professional and using other materials like wood or stone.
Materials and Tools You'll Need
Materials
Concrete mix
Rebar or wire mesh for reinforcement
Wooden boards for formwork
Gravel or crushed stone for the base
Concrete sealer
Concrete adhesive (optional)
Plastic sheeting or tarp
Tools
Shovel
Level
Tape measure
Concrete mixer or wheelbarrow
Trowel
Float
Rebar cutter or hacksaw
Drill with mixing attachment
Hammer and nails
Screed
Protective gear (gloves, mask, safety glasses)
Step-by-Step Guide
1. Plan and Design
Start by designing your stairs. Measure the height and width of the area where you plan to build the stairs. Determine the number of steps and the dimensions of each step (rise and run). A typical step height (rise) is 7-8 inches, and the depth (run) is around 10-12 inches.
2. Prepare the Site
Clear the area where the stairs will be located. Remove any debris, grass, or old steps. Excavate the site to a depth of about 6-8 inches to create a stable base for the stairs. Fill the area with gravel or crushed stone and compact it well to provide a solid foundation.
3. Build the Formwork
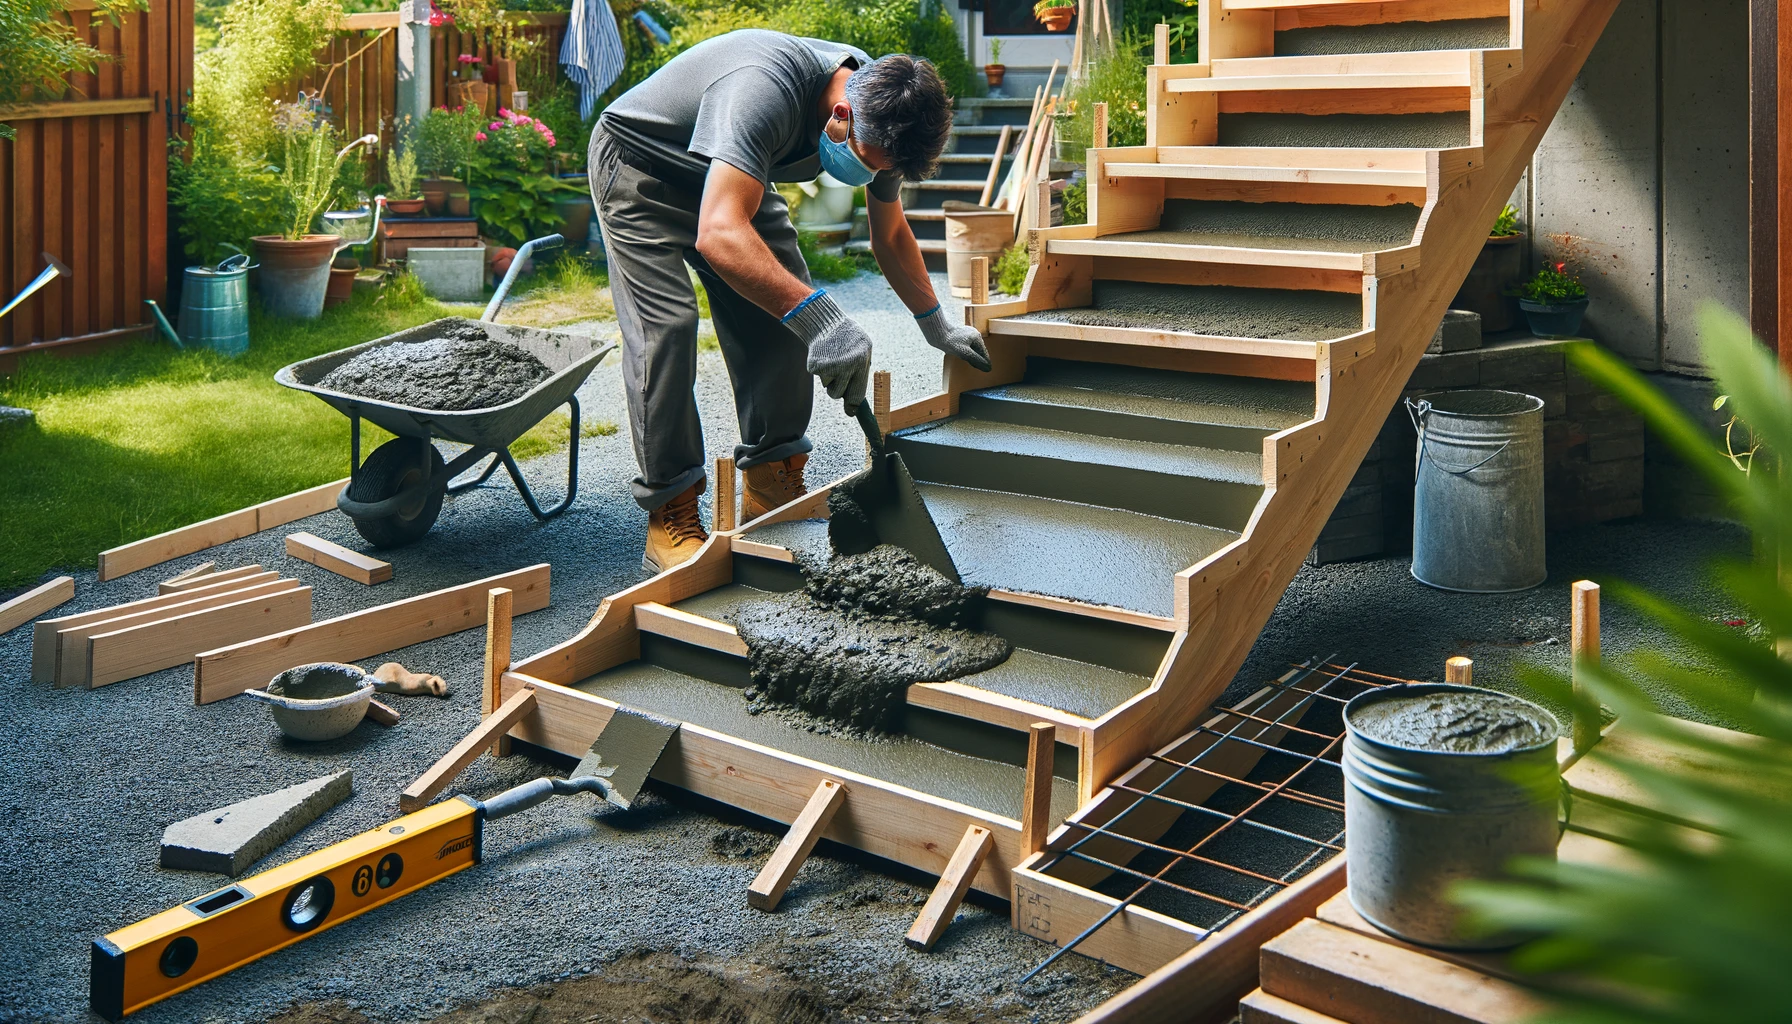
Construct the formwork using wooden boards to create molds for the concrete. Ensure the forms are level, square, and securely braced to prevent movement. Use stakes and nails to hold the forms in place. Apply a release agent to the inside of the forms to prevent the concrete from sticking.
4. Install Reinforcement
Place rebar or wire mesh inside the formwork to reinforce the concrete and prevent cracking. Cut the rebar to fit the dimensions of the stairs and secure it with ties or wire.
5. Mix and Pour the Concrete
Mix the concrete according to the manufacturer's instructions. If you're using a concrete mixer, follow the guidelines for proper consistency. If mixing by hand, use a wheelbarrow and a shovel. Pour the concrete into the formwork, starting at the bottom step and working your way up. Use a trowel to spread and level the concrete.
6. Screed and Finish the Concrete
Use a screed to level the surface of the concrete, ensuring a smooth and even finish. Work the screed back and forth across the top of the forms to remove excess concrete. Use a trowel and float to smooth the surface and create a consistent texture. If desired, add a non-slip finish by lightly brushing the surface with a broom.
7. Cure the Concrete
Cover the stairs with plastic sheeting or a tarp to retain moisture and allow the concrete to cure slowly. Keep the concrete moist for at least 48 hours to ensure proper curing and strength. Avoid using the stairs during this time to prevent damage.
8. Remove the Formwork
Once the concrete has cured, carefully remove the formwork. Start by removing the stakes and nails, then gently lift the forms away from the concrete. If any edges need smoothing, use a trowel or sandpaper.
9. Seal the Stairs
Apply a concrete sealer to protect the surface from stains, moisture, and wear. Follow the manufacturer's instructions for application and drying times. Sealing the stairs will enhance their durability and appearance.
Tips for Success
Safety First: Always wear protective gear when working with concrete.
Take Your Time: Rushing the process can lead to mistakes and poor results. Work methodically and carefully.
Check Levels Frequently: Ensure each step is level and consistent with the others to avoid uneven stairs.
Consult Local Codes: Check local building codes and regulations for stair construction to ensure compliance.
Conclusion
Building your own concrete stairs can be a rewarding and cost-effective project that enhances the functionality and aesthetics of your home. With careful planning, the right materials, and a step-by-step approach, you can achieve professional-quality results. Happy building!
For more DIY projects and expert advice on working with concrete, visit NearbyConcreteContractors. We're here to help you turn your home improvement dreams into reality.

About Our Concrete Services
Searching for reliable concrete contractors? We specialize in providing high-quality concrete solutions for both residential and commercial projects. Our team delivers durable and aesthetically pleasing driveways, patios, and commercial concrete work tailored to your specific needs. Whether you need new installations or repairs, we ensure top-notch craftsmanship and materials to guarantee longevity and customer satisfaction. Contact us today for a free estimate and discover how our expert concrete services can transform your property. Call +1 877-355-0736 or visit our website for more details.
Get Your Free Estimate Now!
Tap to Call on Mobile


